

From MIL to SIL
A typical workflow develops a controller as a model, then replaces it with compiled software and shows that both behave the same. DEP does this with one System and two profiles. Saved scenarios run back to back in MIL and SIL, and DEP reports the differences for each output. This tutorial uses the bundled Multi ECU powertrain coordination project and takes about 20 minutes.
The example
The project contains five components: BMS (battery management), VCU (vehicle control), MCU (motor control), EVCC (charging communication) and Plant (the vehicle and battery). The four controllers each have a MIL implementation, an editable native model, and a SIL implementation, a compiled reference application in the jsonl-v1 format. The project also includes CAN and CAN FD databases and three saved scenarios:
- Acceleration and braking
- Isolation fault and explicit recovery
- Charge request and stop
The compiled controllers are DEVlink synthetic reference applications (Real jsonl-v1 / DEVlink synthetic reference; not OEM firmware). The EVCC is not a complete charging-protocol stack.
1. Open and inspect in MIL
- Open the projectOverview → Projects → Open on Multi ECU powertrain coordination. Save your own copy with File → Save Project As....
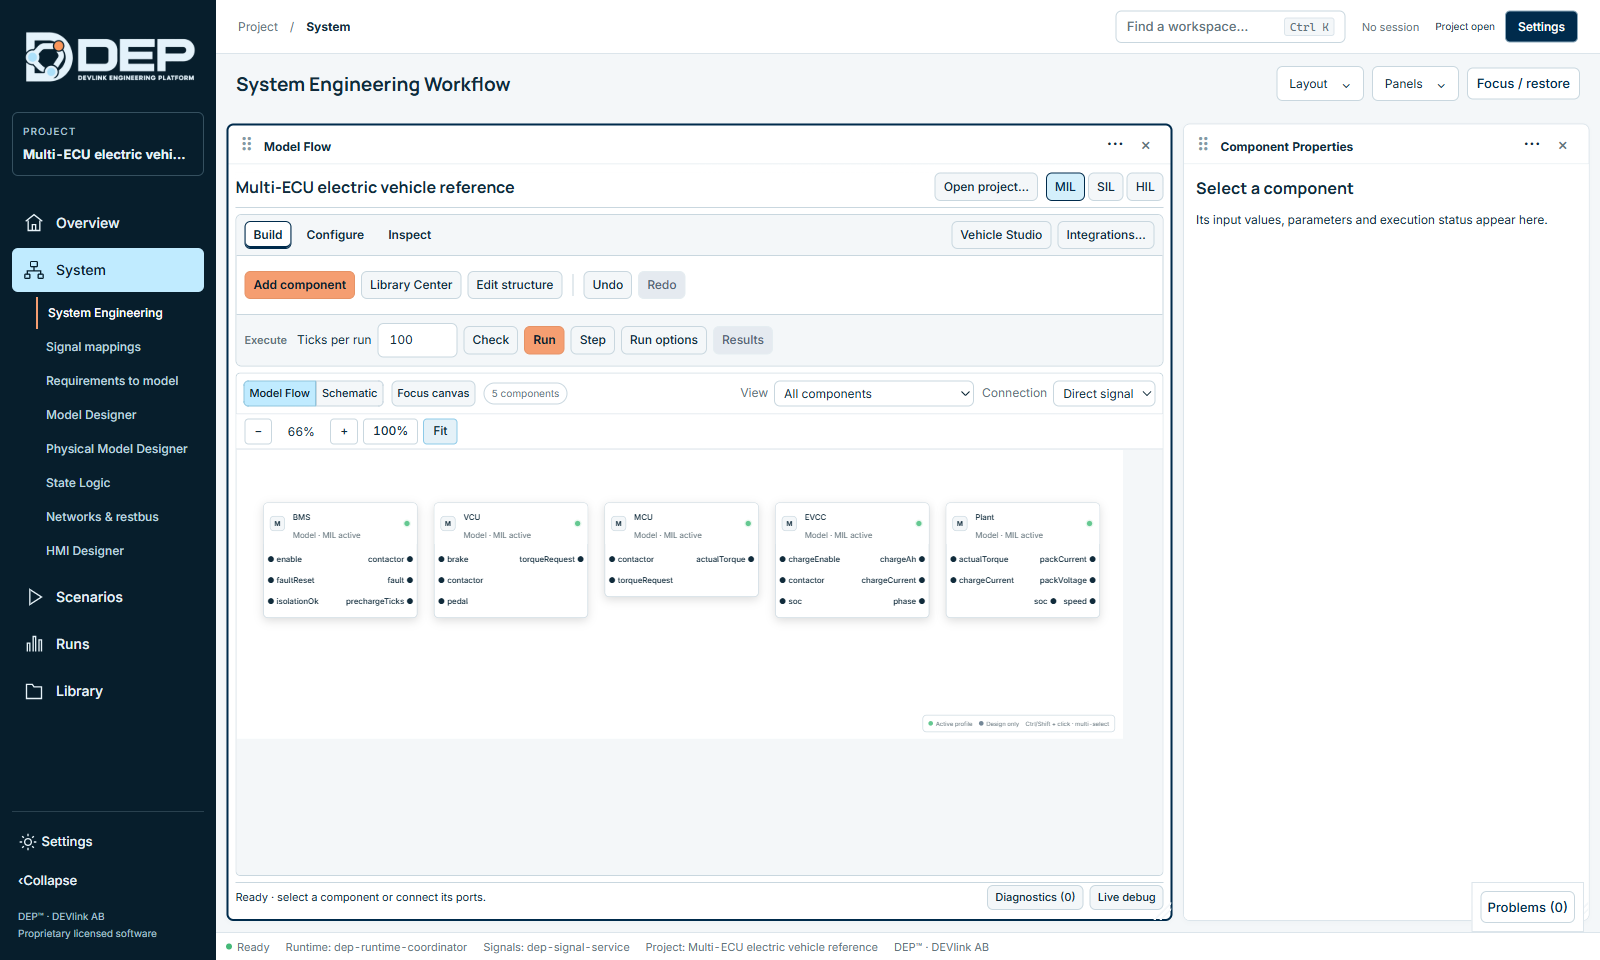
- Open the SystemSelect Open System, then Fit. All components show Model · MIL active.
- Check in MILSelect Check. The check passes.
2. Switch to SIL and review the implementations
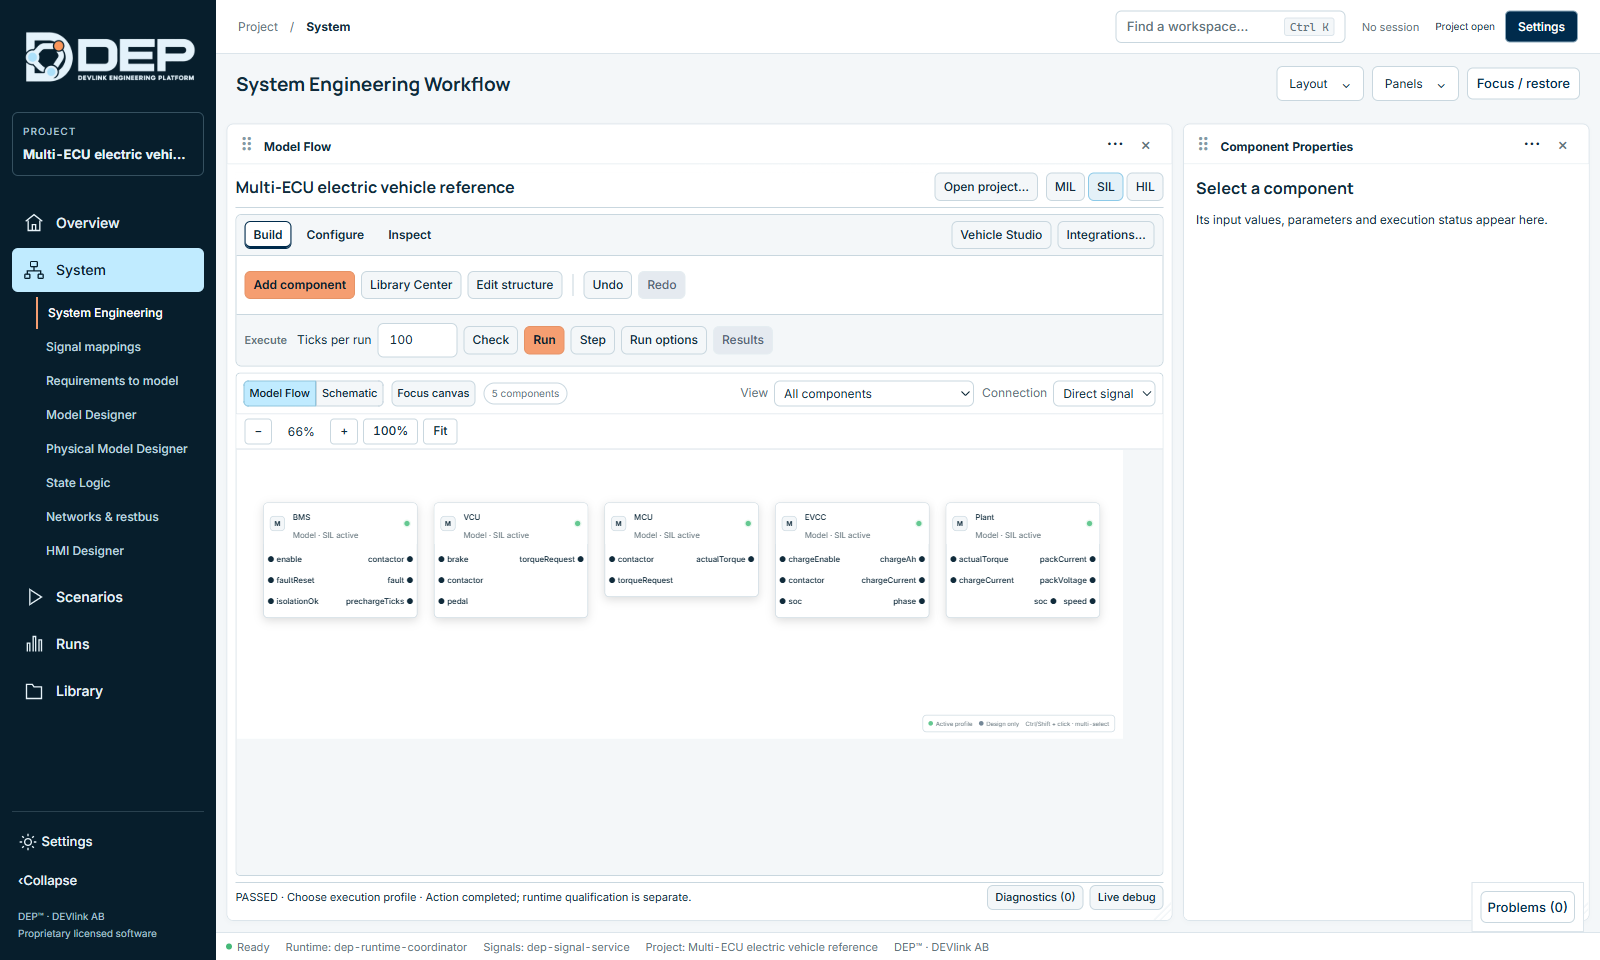
- Select SILSelect SIL above the canvas. The status line reports PASSED · Choose execution profile, and the components now show Model · SIL active.
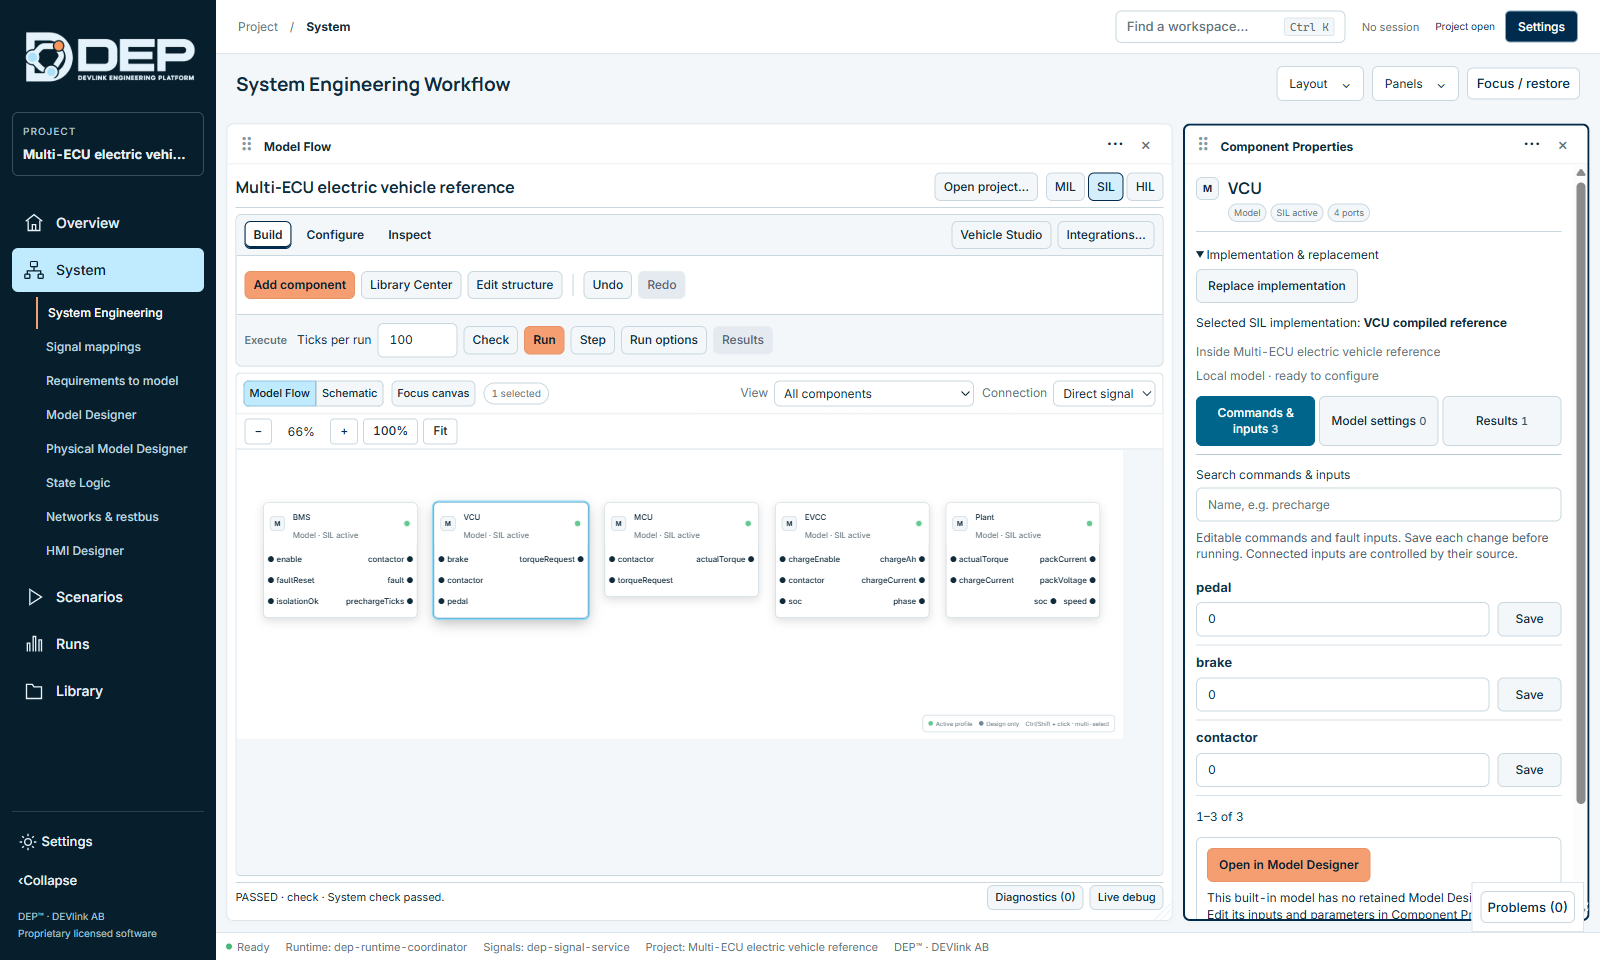
- Review an implementationSelect VCU and expand Implementation & replacement. It reads Selected SIL implementation: VCU compiled reference.
- Check in SILSelect Check. The check passes for the SIL profile too. Address every finding before you run.
The compiled software is listed with its identity in Library → Software / FMI / SSP, for example VCU compiled reference · software.e9ea… · customer-software · ready. DEP stores the SHA-256 of every binary and checks it before execution.
3. Run the scenarios in MIL and SIL
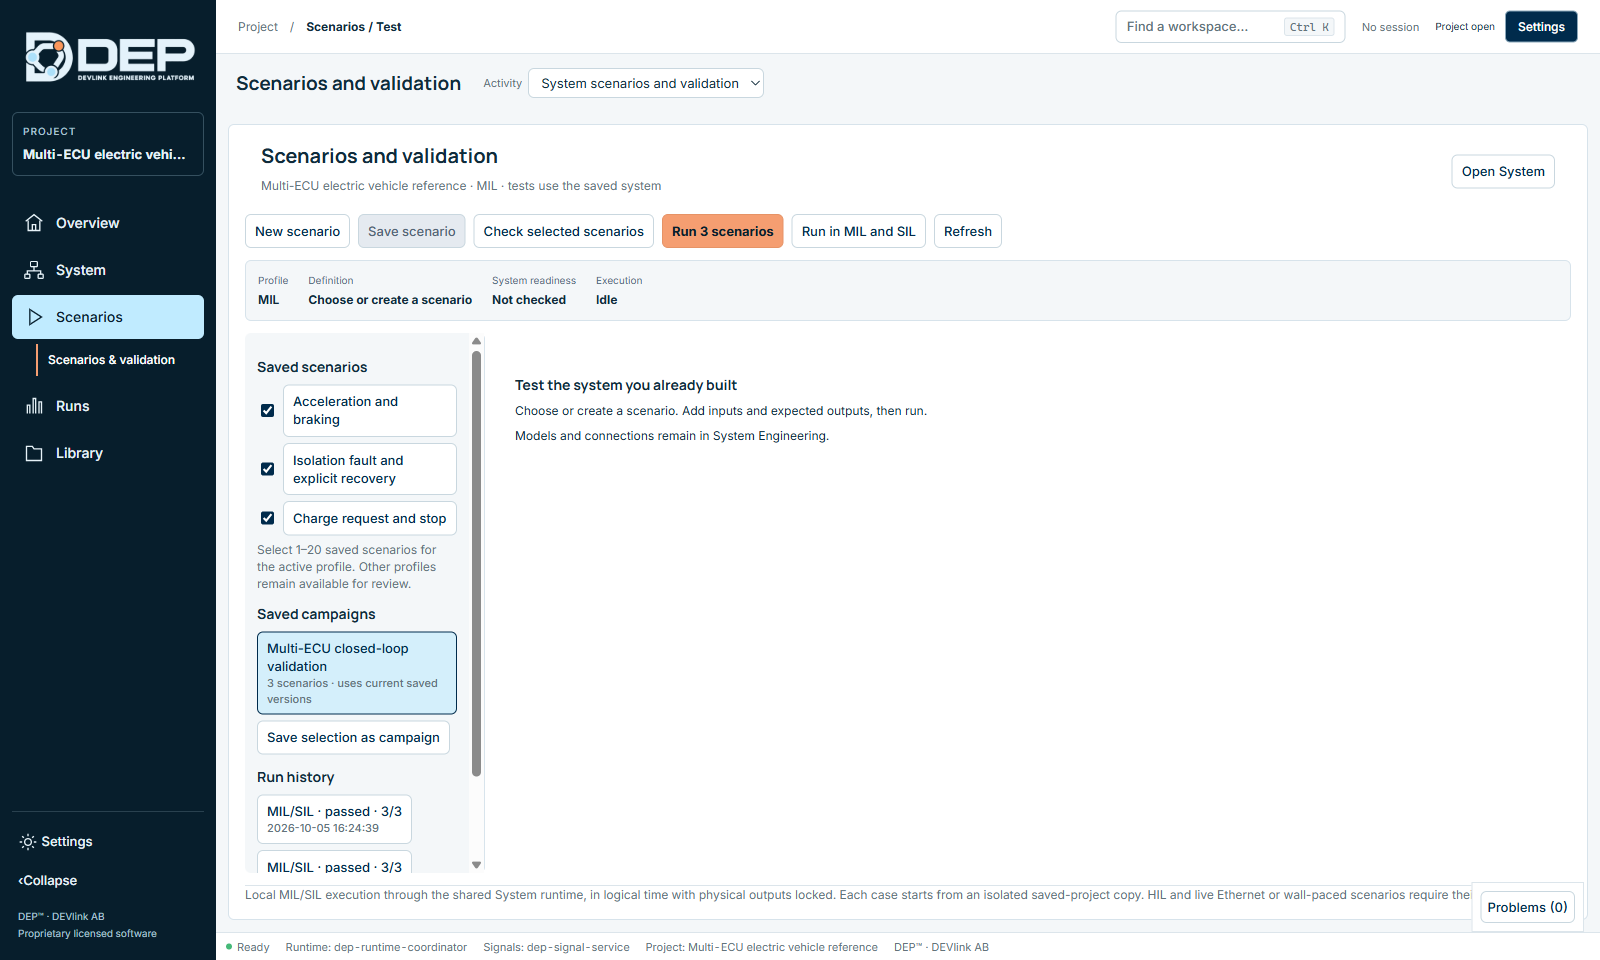
- Open ScenariosSelect Scenarios → Scenarios & validation.
- Select the campaignUnder Saved campaigns, select Multi-ECU closed-loop validation (3 scenarios). The run button changes to Run 3 scenarios. You can also tick individual scenarios under Saved scenarios.
- Run both profilesSelect Run in MIL and SIL. DEP runs every case twice, in MIL and in SIL. Each case runs on an isolated copy of the saved project.
- Wait for the verdictA new entry appears under Run history, for example MIL/SIL · passed · 3/3.
4. Compare MIL and SIL
Select the new run-history entry. The MIL / SIL comparison opens:
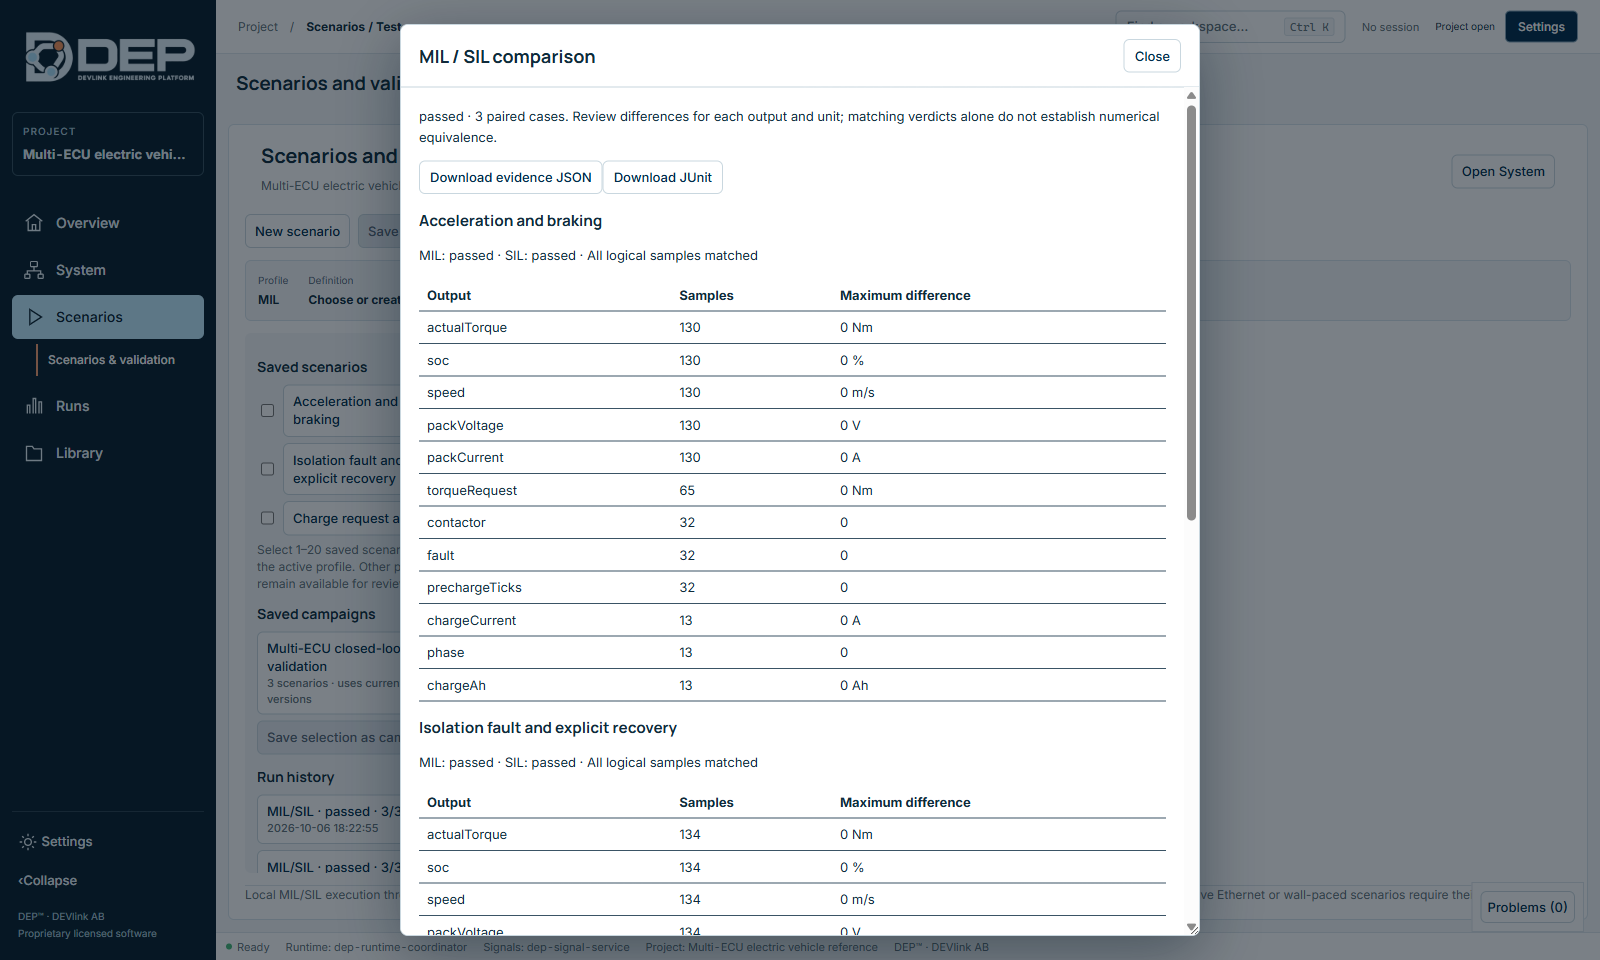
- For each scenario: MIL: passed · SIL: passed · All logical samples matched.
- For each output: the number of samples and the maximum difference between MIL and SIL, with its unit. In this example every difference is 0.
- Outputs updated at different rates have different sample counts, for example 130 for the plant and 32 for the BMS.
Matching verdicts alone do not prove numerical equivalence. Look at the maximum differences for each output and unit. A match in these reference cases says nothing about other software or other inputs.
5. Export the evidence
In the comparison, select Download evidence JSON or Download JUnit and choose where to save. The JSON contains the project revision, implementation hashes, run settings and every check. The JUnit XML can be loaded into CI dashboards. To keep a reference, note the project revision and implementation hashes shown in the evidence.
Use Compare with a saved run to compare against an earlier run-history entry, for example before and after a software update.
6. Exercise the session controls
In System Engineering, with SIL selected, run a few batches and try Step, Continue, Reset and Stop. If a software process fails, DEP reports a classified diagnostic, for example DEP-SIL-IMPLEMENTATION-MISSING or DEP-REC-OWNER. Do not retry an operation whose outcome is unknown without inspecting the state first.
Bring your own software into SIL
- Import the software: Library → Software integration → inspect, review and trust, import (see Software, FMI and SSP). An FMU is imported with Import FMU.
- In System Engineering, open Integrations… → Software implementations.
- Choose the System component, choose the imported implementation as SIL implementation and select Assign SIL implementation.
- Select SIL, run Check, and fix port or rate mismatches. Use Replace implementation when ports need mapping.
- Write scenarios in MIL first, then run them in MIL and SIL.
Coordinated SIL
Coordinated SIL runs several software participants with their own sample periods and a simulated CAN network in one coordinated, replayable session. Open it from Integrations… → Execution and deployment.
| Control | Purpose |
|---|---|
| Create compiled SIL example | In an empty System, creates three software components plus a native plant on a SIL_CAN network with 10 ms periods. Use this to learn the workflow. |
| Simulation rate, Maximum lateness (ms) | Timing of the coordinated run. |
| Bus bindings | Model output → bus signal and Bus signal → model input. |
| Save coordination, Check System | Store and validate the setup. |
| Run coordinated SIL | Runs up to 10,000 ticks. The run can be cancelled. |
| Reset and verify replay | Replays the run and verifies identical results. |
| Stop all participants, Reset all participants | Stop or reset every software process. Use Reset after DEP-SIL-REMOTE. |
| Export evidence | Saves the coordinated run evidence. |
Participants can also run on a remote machine or as SIL Kit participants. Remote participants need TLS files (CA, client certificate and private key), configured as environment-variable references. Problems with them are reported as DEP-SIL-REMOTE-CONFIG.