

Operator HMI
The HMI workspace builds operator screens with gauges, values, LEDs, buttons, sliders, trends and alarm lists, all bound to the System's canonical signals. It has two modes: Edit to design pages, and Operate to watch and command a running System. Open System → HMI Designer to design, or Runs → Operator HMI to operate.
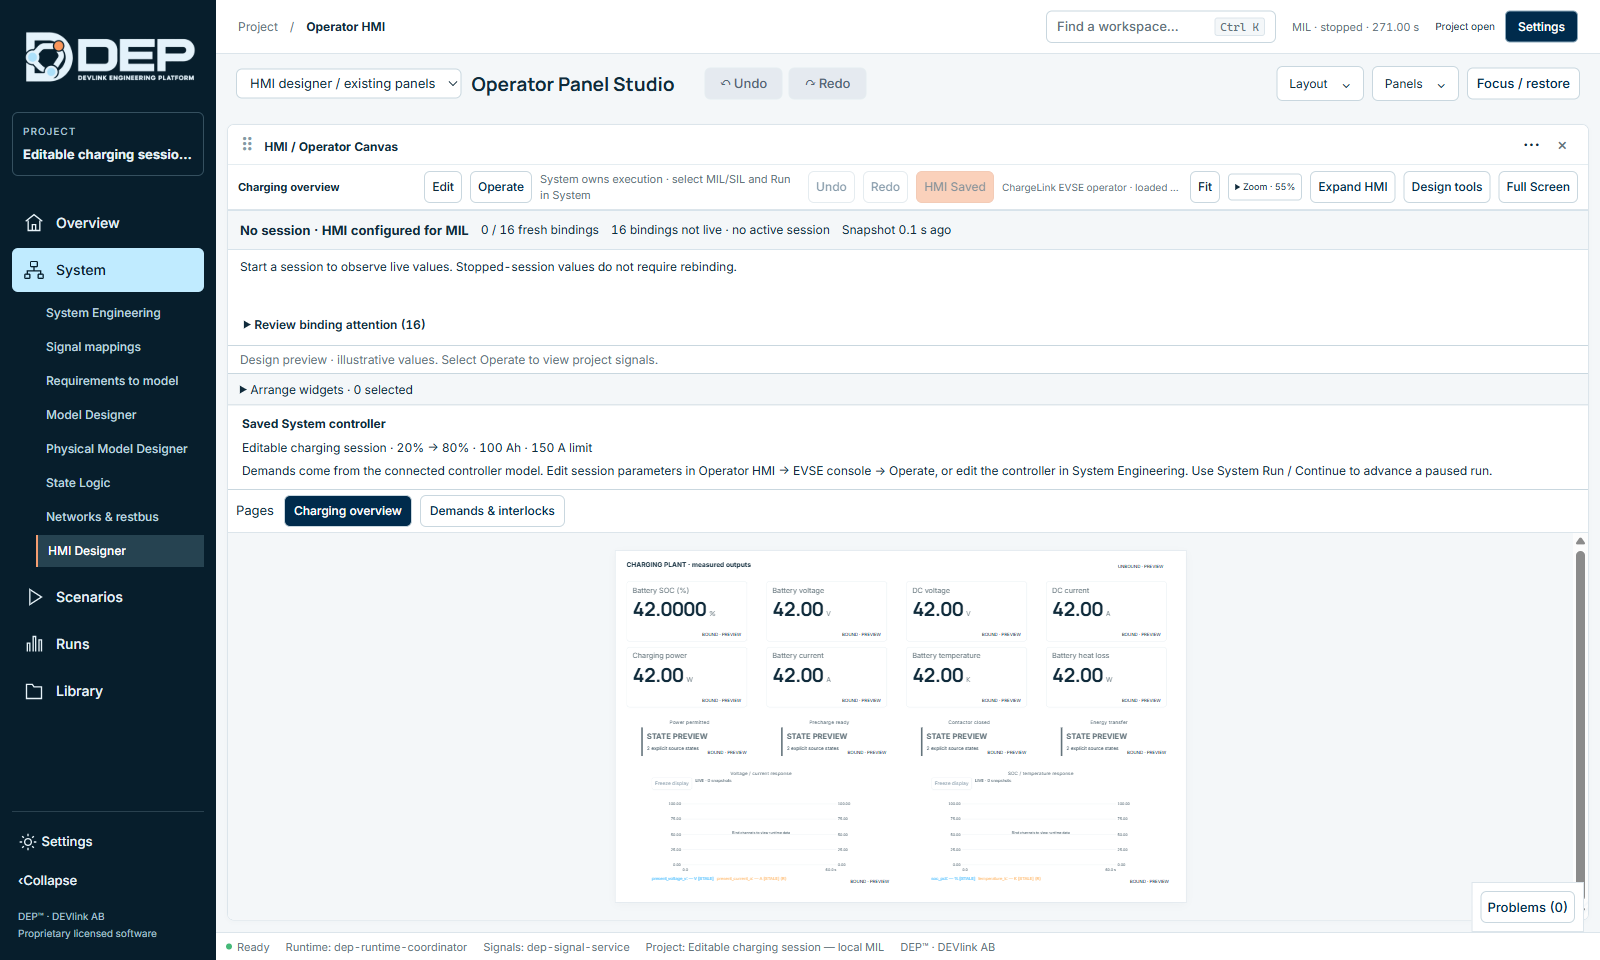
Activities
The activity selector at the top left offers HMI designer / existing panels (this chapter) and, in projects with a charging plant, EVSE console (see Charging and the EVSE Console).
The canvas toolbar
| Control | Purpose |
|---|---|
| Page tabs (for example Charging overview, Demands & interlocks) | Switch pages. |
| Edit / Operate | Design mode, or live operator mode. |
| Undo, Redo, Save HMI | Edit history and saving. The button shows HMI Saved when there are no unsaved changes. |
| Fit, zoom, Expand HMI, Full Screen | View size. |
| Design tools | Shows or hides the HMI Library and Properties panels. |
| Binding status | For example 0 / 16 fresh bindings · 16 bindings not live · no active session, and Review binding attention (n). |
The note System owns execution · select MIL/SIL and Run in System is a reminder that the HMI shows and commands the System session. The session itself is started in System Engineering, or with the run controls in Operate mode.
Design a page (Edit mode)
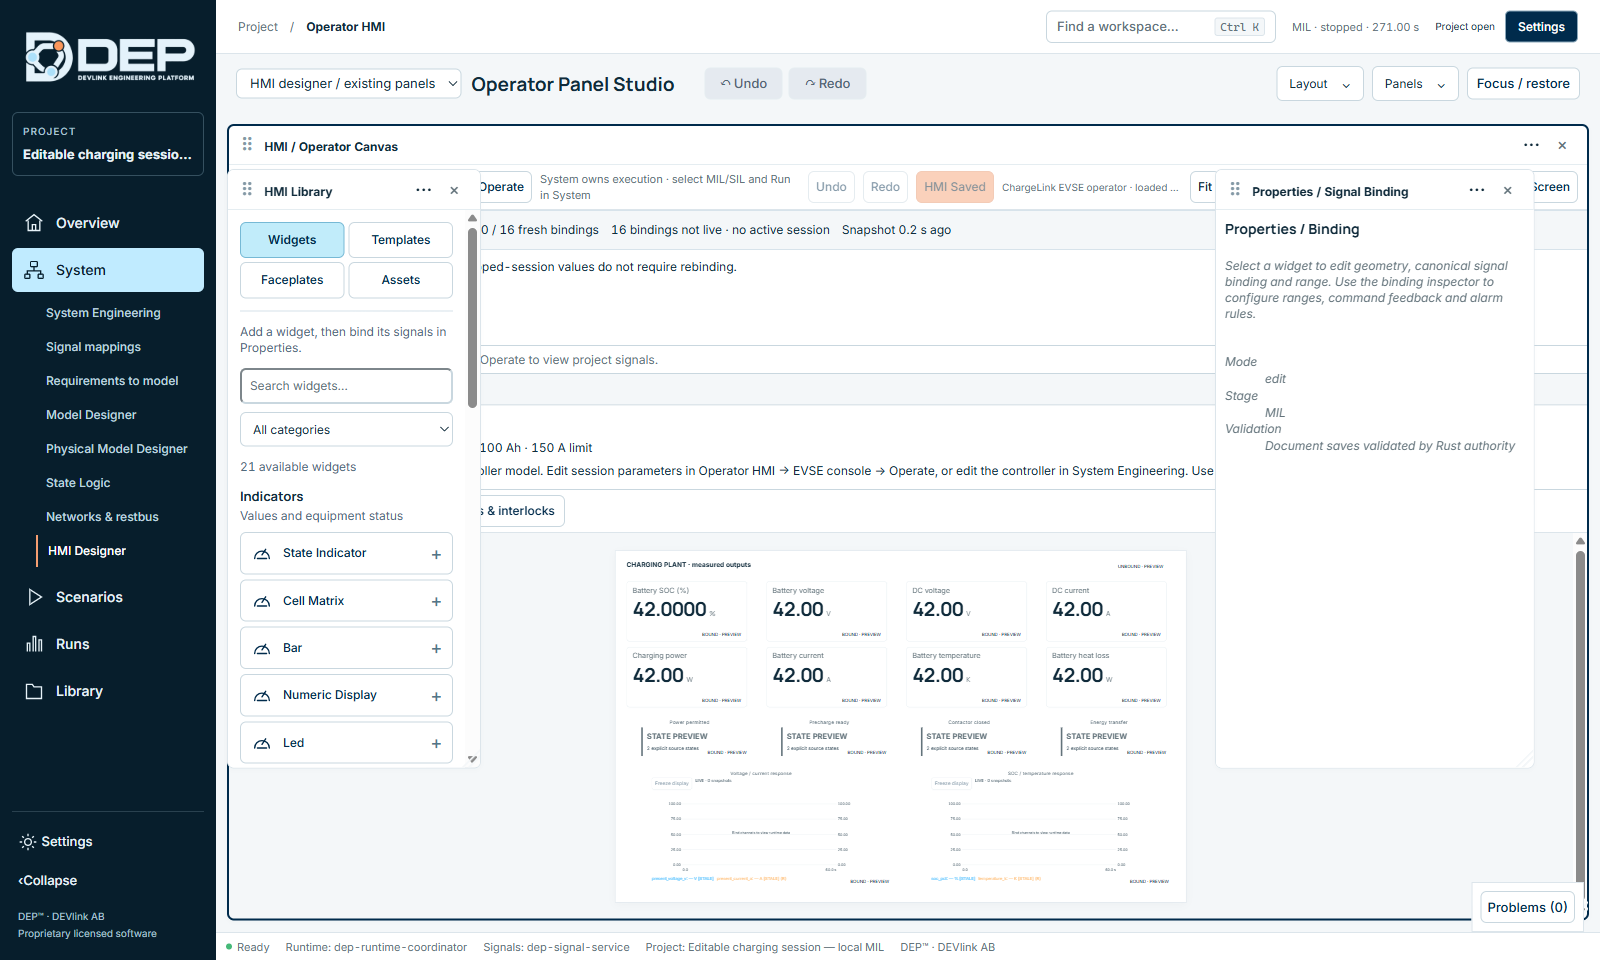
Widgets
The HMI Library panel has the tabs Widgets, Templates, Faceplates and Assets. It lists 21 widgets:
| Category | Widgets |
|---|---|
| Indicators: values and equipment status | State Indicator, Cell Matrix, Bar, Numeric Display, Led, Gauge, Progress Arc, Battery Gauge |
| Controls: operator commands and setpoints | Button, Toggle, Slider, Knob |
| Data: trends, signals and recorded events | Alarm List, Event History, Time Plot, Xy Plot, Table |
| Graphics: labels, images and decoration | Label, Image, Shape |
| Composition: navigation between pages | Page Navigation |
Select + next to a widget, or drag it onto the canvas. In Edit mode, widgets show illustrative preview values (Design preview · illustrative values), for example 42.00. Real values appear only in Operate mode.
Bind a widget to a signal
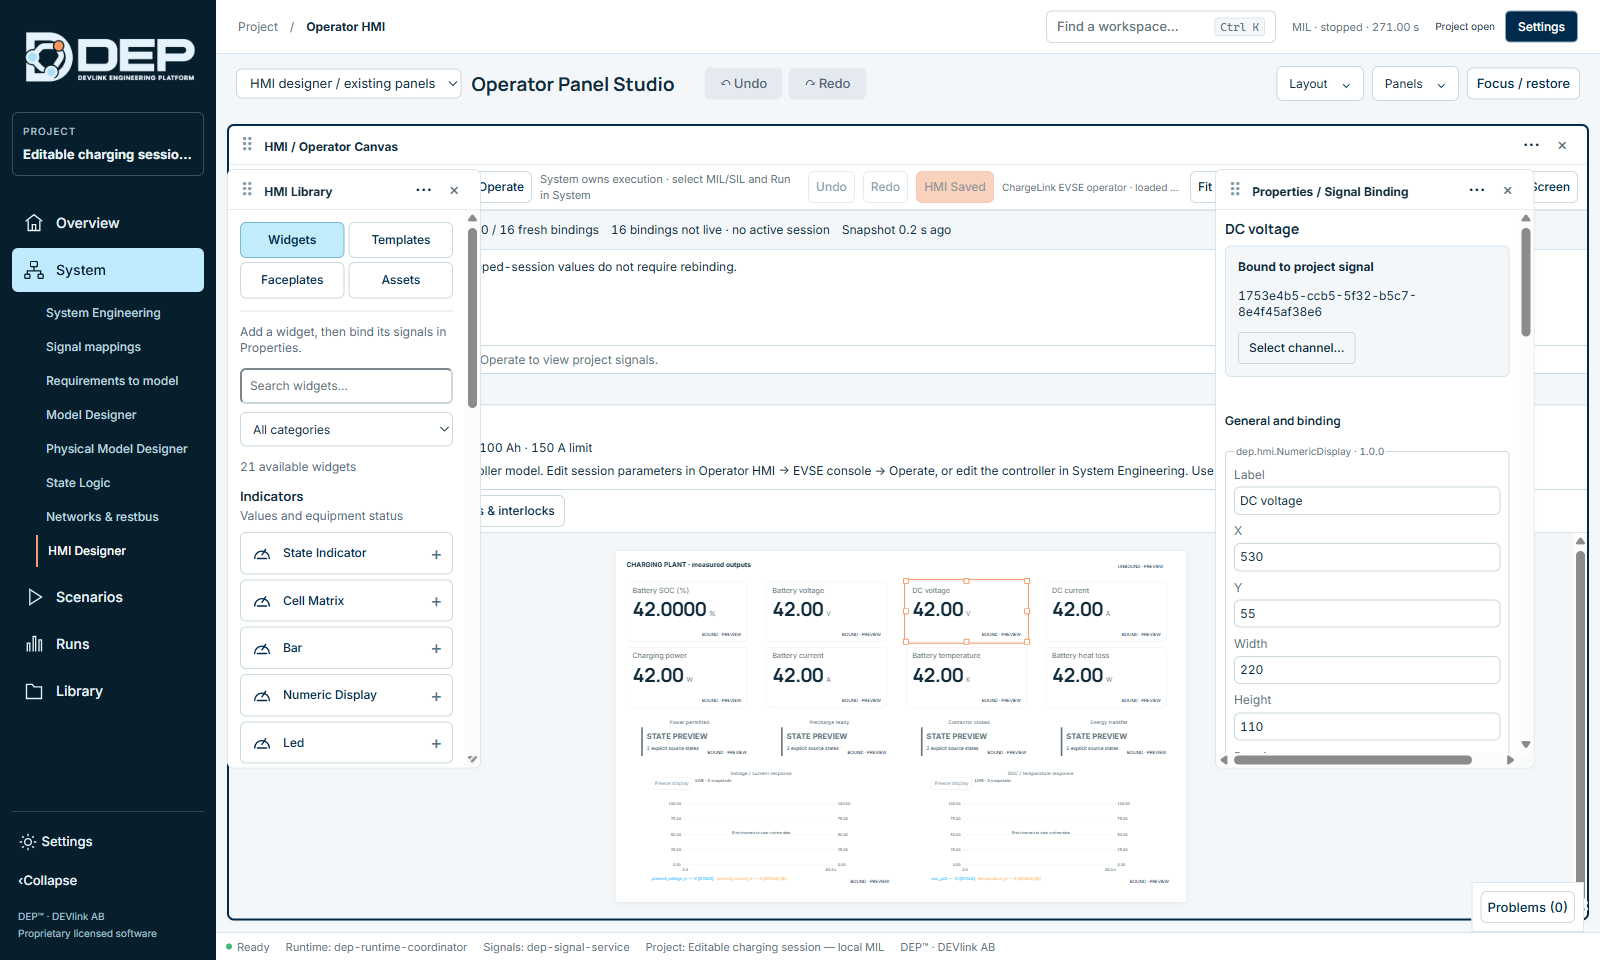
- Select the widgetClick it on the canvas. Properties / Signal Binding shows its geometry, binding and range.
- Choose the signalSelect Select Channel… and pick a source: User Channels (canonical channels of the System) or Runtime / External Gateway.
- BindSelect Bind. The widget's badge changes from UNBOUND to BOUND. Use Unbind to remove the binding.
- Create a channel if neededCreate canonical user channel with access Read, Command or ReadWrite, then Create & Bind.
- Set the rangeSet minimum, maximum and unit so that gauges and bars scale correctly.
Alarm and state rules
In the binding inspector, add rules that react to the bound value:
- Alarm rule: Condition (gt, lt, eq, ne), Threshold, a message or state label, an optional reset threshold (hysteresis), Alarm delay (ms) and Severity (info, warning, critical). Select Add alarm rule.
- State rule: a state colour, Disable command while condition holds (or input is not GOOD) and Blink while matching and alarm is unacknowledged. Select Add state rule.
Arrange
Arrange widgets provides align (left, right, top, bottom), centre, distribute, match width/height/size, group and ungroup, copy, paste and duplicate, with a snap grid. Keyboard: Shift+click adds to the selection, Alt bypasses snapping, and the arrow keys nudge by 1 px (10 px with Shift).
Pages, templates and faceplates
- Pages: New page from template, Duplicate page, Delete page, Size preset. Add a Page Navigation widget so operators can switch pages.
- Templates and Faceplates: reusable groups of widgets. Select widgets and use Capture selection to create one, then Insert faceplate to reuse it. Bind and add template places a template with its bindings.
- Assets: Import SVG or asset manifest for your own graphics. Export library package shares faceplates with other projects.
Select Save HMI when done. If the panel changed while saving, DEP asks you to save the latest edits before operating.
Operate
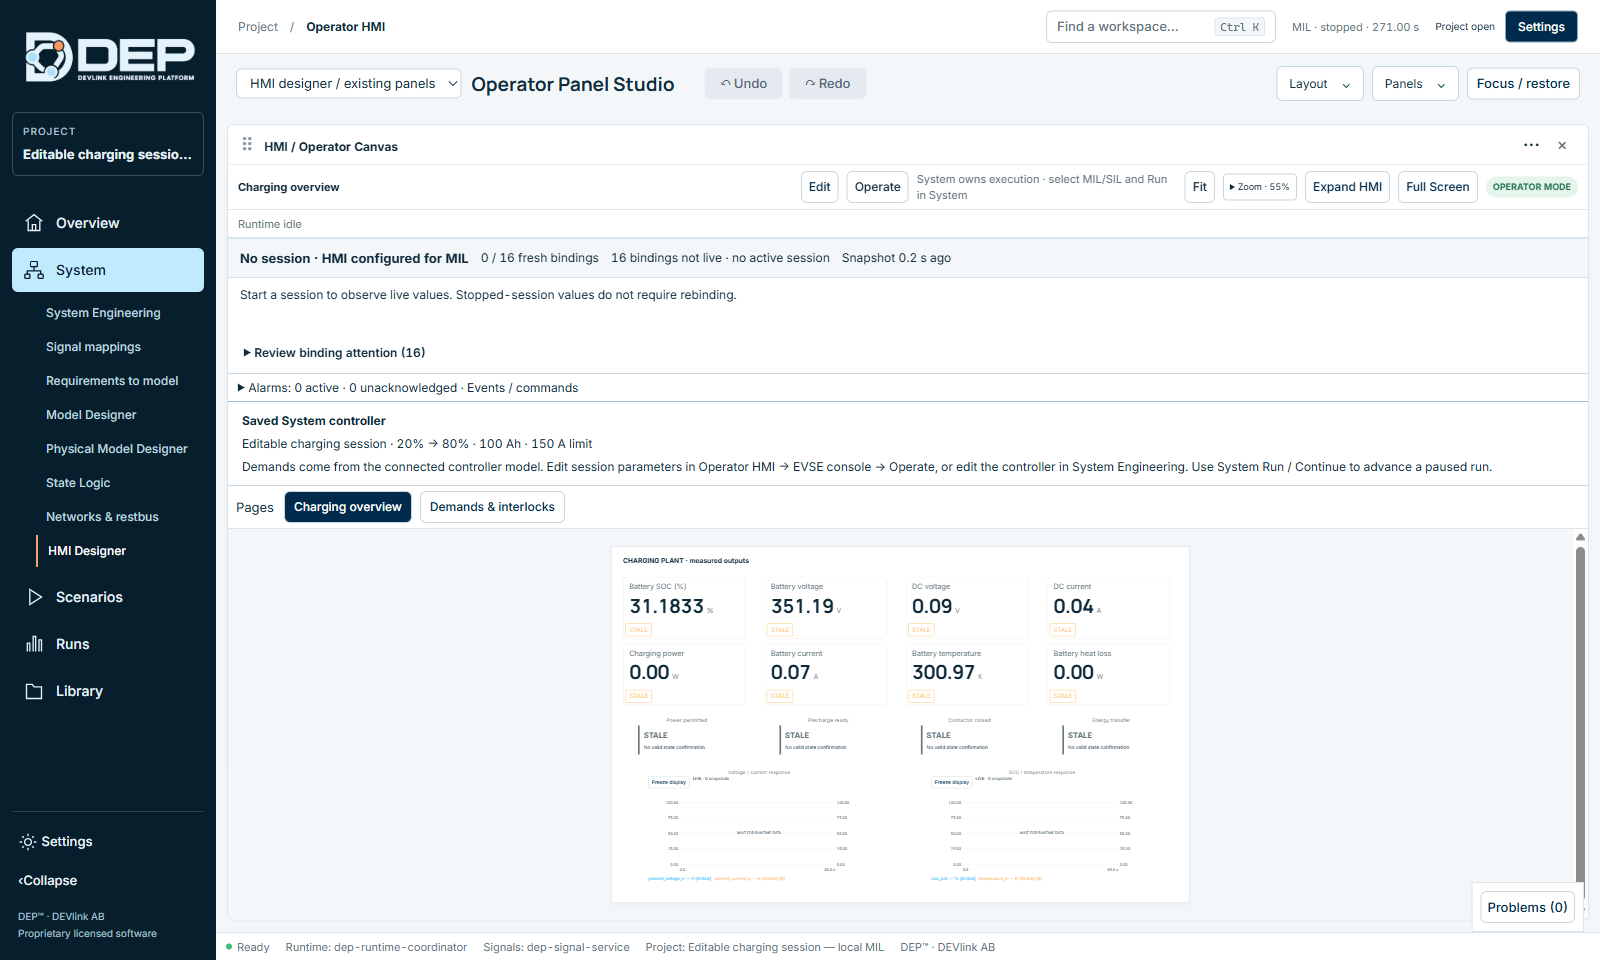
- Switch to OperateSelect Operate, or open Runs → Operator HMI. The header shows OPERATOR MODE and the runtime state, for example Runtime idle.
- Start the SystemThe System owns execution. Select the profile (MIL or SIL) and use Run / Continue in System Engineering or the Execution Center. HIL runs on an NI VeriStand bench (see HIL Runtime and NI VeriStand). Change the stage only while the runtime is stopped (Stop runtime before changing execution stage).
- Watch and commandBound widgets show live values once the session runs, and the binding status shows n / n fresh bindings. Buttons, toggles, sliders and knobs write to Command channels.
- Handle alarmsThe alarm bar shows Alarms: n active · n unacknowledged · Events / commands. Expand it to filter alarms by source, code or message and to acknowledge them.
After a session stops, widgets keep the last values and mark them STALE, as in the screenshot: Stopped-session values do not require rebinding. Review binding attention (n) lists bindings that are not live and the reason.
Projects with a charging plant add the EVSE console activity, which has its own session controls. See Charging and the EVSE Console.