
Requirements to Model
This workspace takes you from written requirements to an editable DEP model, with the requirements kept next to the model as a versioned baseline. You can compose behaviour from rules and equations without AI. You can also ask the optional DEP Engineering CoPilot to propose a model. Open it with System → Requirements to model.
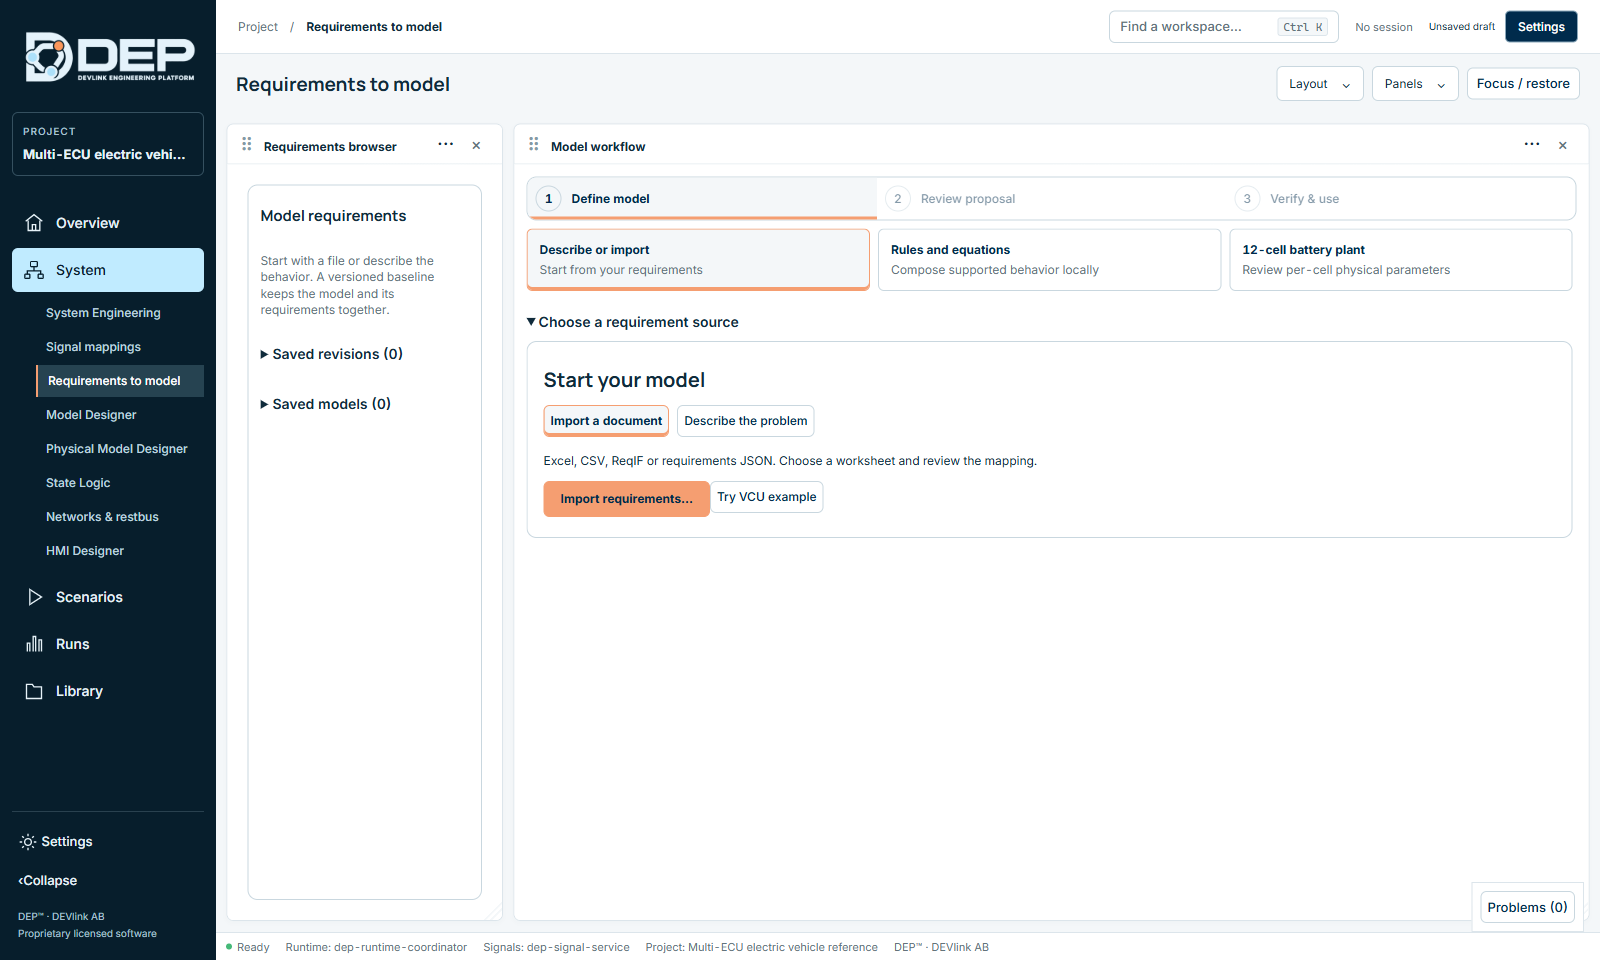
The three steps
- Define modelImport requirements or describe the problem, then choose how to build the model.
- Review proposalInspect the proposed blocks, parameters and requirement links, and correct them.
- Verify & useRun numerical verification against expected values, then save the model and prepare it for the System.
Step 1: get requirements in
| Option | Use it when |
|---|---|
| Import a document → Import requirements… | You have Excel, CSV, ReqIF or requirements JSON. Choose the worksheet and map the ID and description columns. Problems are reported as DEP-REQ-IMPORT, and your current baseline is not replaced. |
| Describe the problem | You want to type the requirements yourself. |
| Try VCU example | You want to see the workflow with a ready-made baseline: VCU torque demand with two requirements. |
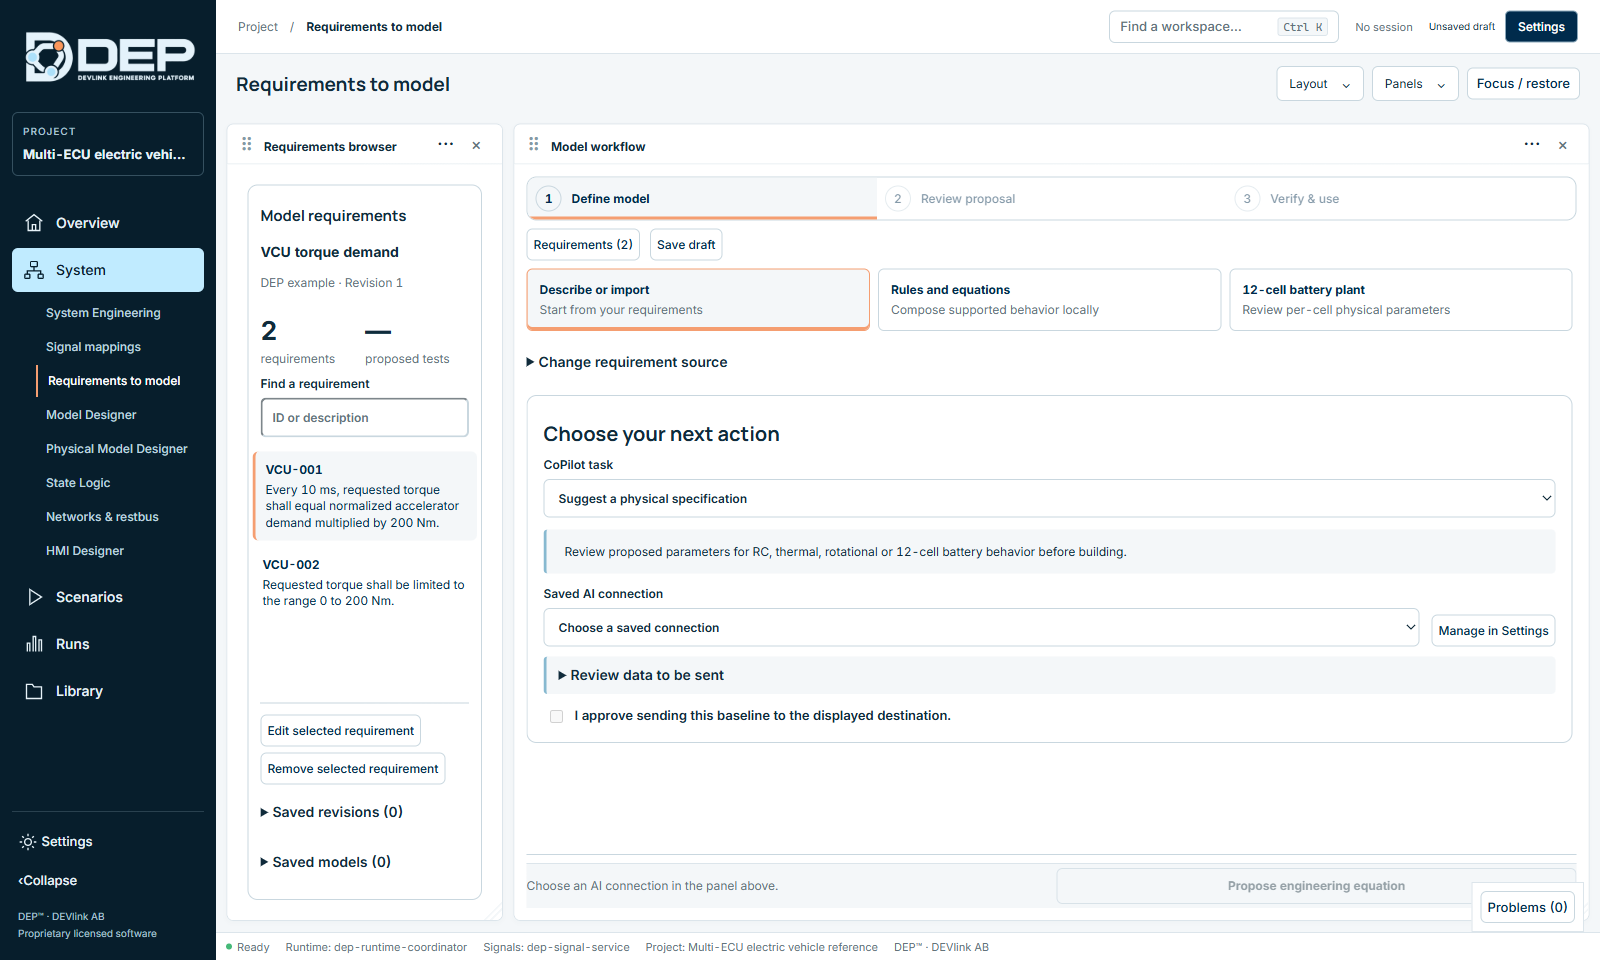
In the browser, find a requirement and select it, then use Edit selected requirement or Remove selected requirement. Select Save draft to keep your work. Resume saved draft continues later. Saved revisions and saved models are listed under the browser.
Step 1b: choose how to build the model
- Describe or import: start from your requirements (above).
- Rules and equations: Compose supported behavior locally. The guided rule builder needs no AI connection. You build the model from supported rule and equation forms, each linked to a requirement.
- 12-cell battery plant: Review per-cell physical parameters for a battery plant template.
Optional: the AI CoPilot
If you have set up an AI connection (AI Connections), choose a CoPilot task:
- Suggest a physical specification: proposes parameters for RC, thermal, rotational or 12-cell battery behaviour for you to review before building.
- Generate a control model: proposes a control model from the requirements.
- Improve requirement wording: suggests clearer wording. Accept it with Apply this wording.
- Choose the Saved AI connection. Manage in Settings opens the connection settings.
- Read Review data to be sent.
- Tick I approve sending this baseline to the displayed destination. Nothing is sent before you approve.
- Start the task, for example Propose engineering equation.
Proposals are checked structurally and against behaviour acceptance before anything is created (DEP-AI-PROPOSAL, DEP-MODEL-BEHAVIOR).
Step 2 and 3: review, verify, use
- Review the proposal: each block and parameter shows the requirement it implements.
- Enter test inputs and independent expected values, then run numerical verification. If it cannot complete, DEP reports
DEP-MODEL-VERIFYand records no report. - Save the model. It opens in Model Designer for further editing. Then use Check model → Prepare for System → Verify in System.
A generated model that passes its checks is not proof of physical accuracy. Review the requirements and use expected results that come from an independent source.