

Scenarios, Campaigns and Evidence
A scenario is a saved, repeatable test of the System you already built. It sets inputs, runs a number of ticks and checks outputs against expected values. Scenarios run on an isolated copy of the saved project, so they never change your work, and every run leaves evidence you can export. Open Scenarios → Scenarios & validation.
The workspace
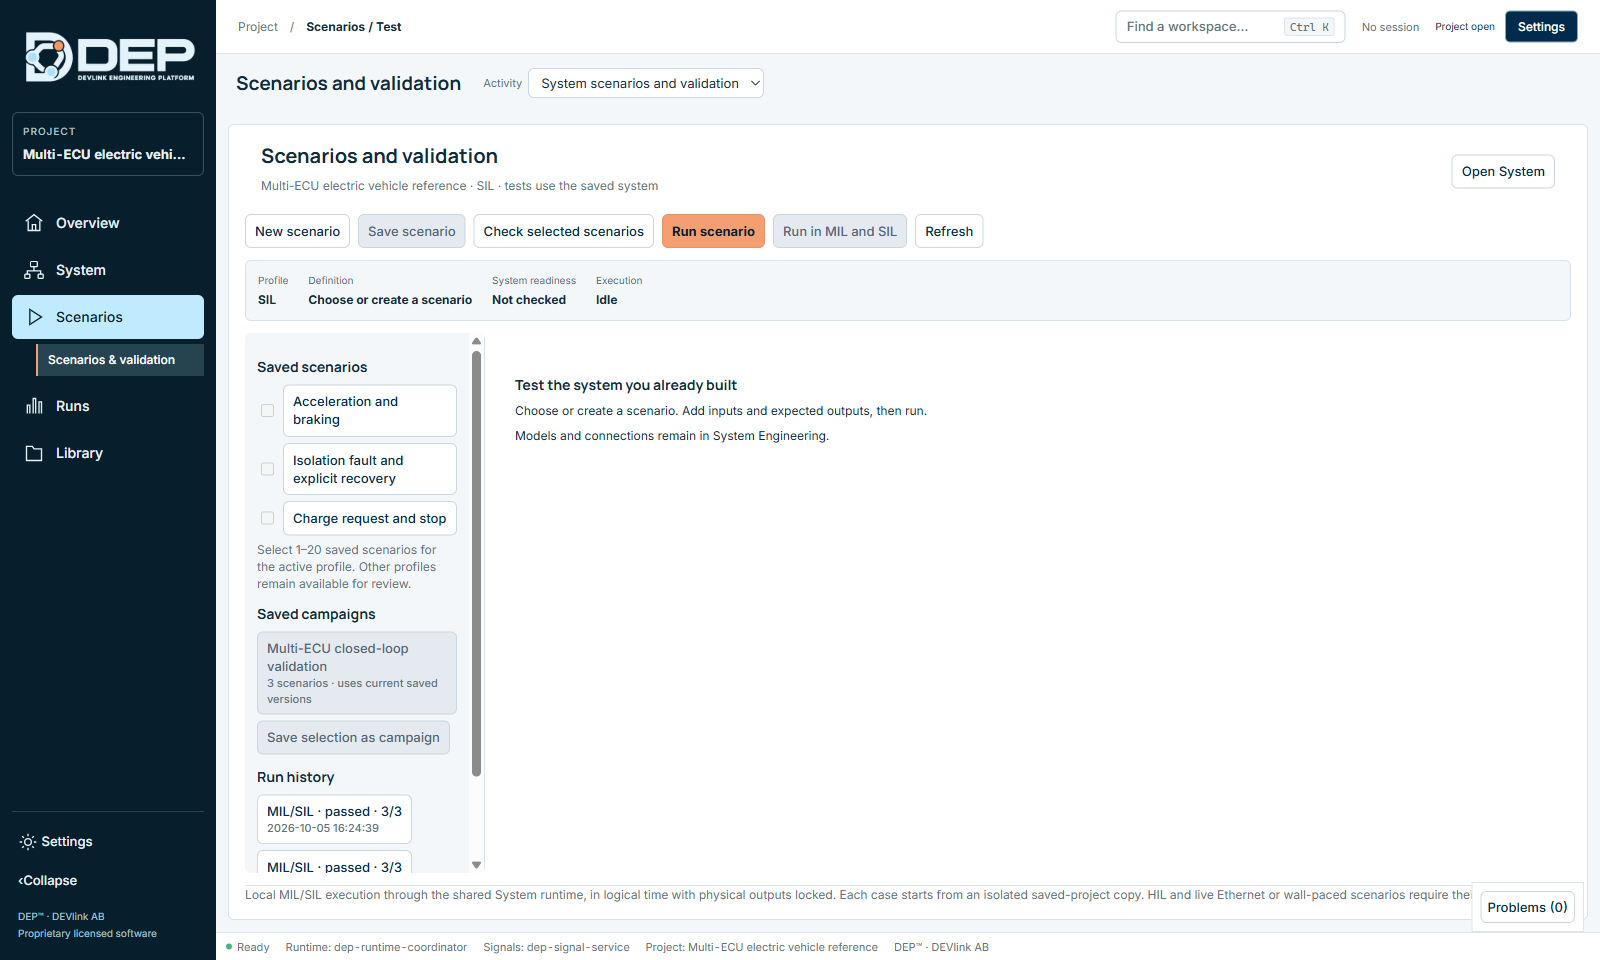
- Toolbar: New scenario, Save scenario, Check selected scenarios, Run scenario (or Run n scenarios), Run in MIL and SIL, Refresh, Open System.
- Status cards: Profile (the System's active profile), Definition (saved scenario or unsaved changes), System readiness, Execution.
- Left column: Saved scenarios (tick 1–20 to select them), Saved campaigns, Save selection as campaign and Run history.
- Editor: Scenario name, the list of steps, Add step and Sweep and repeat.
Scenarios use the profile that is selected in System Engineering. Select MIL or SIL there first. HIL scenarios cannot run here (DEP-TEST-PROFILE).
Step types
| Action | Fields | Use |
|---|---|---|
| Set input | Component variable, value | Set an unconnected input, for example VCU / pedal = 0.5. |
| Run system | Ticks | Advance the System. The dialog shows the tick length, for example One tick = 5 ms of logical model time. |
| Check output | Component variable, Comparison (==, !=, >, >=, <, <=), Expected value, Absolute tolerance | The verdict. The tolerance applies to equality comparisons. |
| Wait for output condition | Component variable, Comparison, Expected value, Timeout ticks | Run until the condition holds, for example until a contactor closes. The case fails if the timeout is reached first. |
| Change parameter | Component parameter, Value | Change a model setting during the case. |
| Inject input fault / Clear input fault | Component variable, Value | Overrides an unconnected MIL/SIL input with a fault value until Clear input fault restores it. It does not inject a physical or bus fault. |
| Write user channel / Check canonical channel | Canonical channel, Value, or a comparison | Work with canonical signals and HMI user channels. |
| Use existing network scenario | Network scenario | Reuse a network scenario (see below). |
| Note | Text | A comment in the step list. |
Each step in the list has ↑ (move up), Edit and Remove.
Worked example: check a first-order lag
This uses the System from Build Your First System (Gain → First Order). The test: with an input of 10, the lag output must exceed 8 after 1 s.
- PrepareIn System Engineering, select MIL and release any session (Reset & release session). Then open Scenarios → Scenarios & validation.
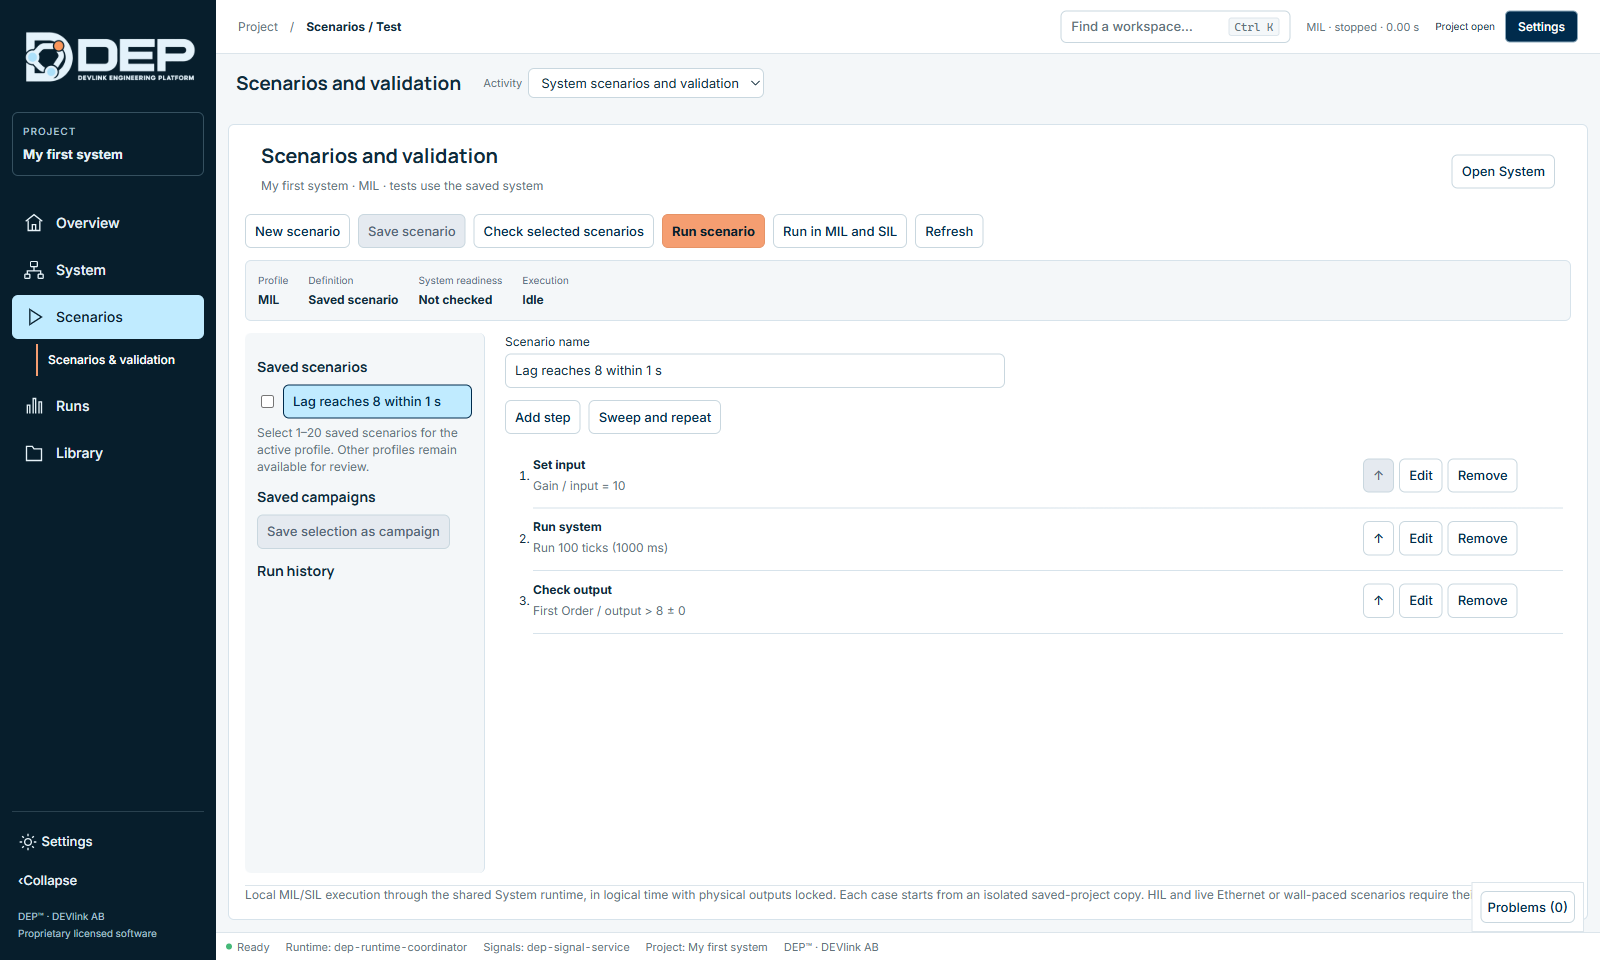
- New scenarioSelect New scenario and type the Scenario name Lag reaches 8 within 1 s.
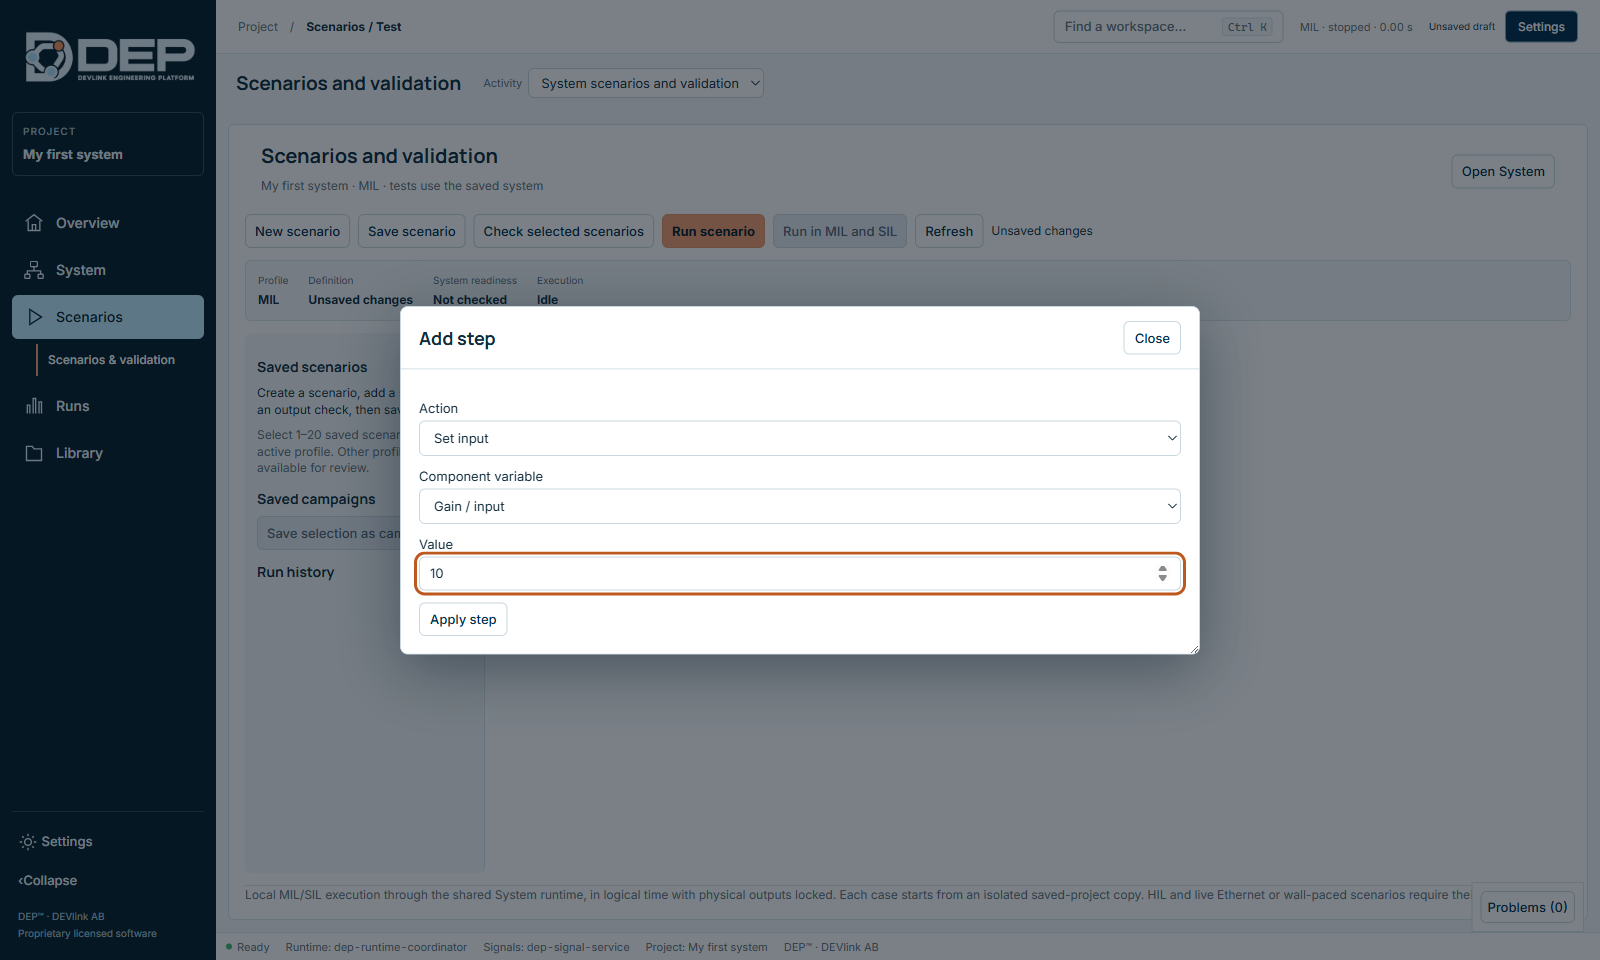
- Step 1: Set inputSelect Add step, choose the Action Set input, the Component variable Gain / input, enter
10and select Apply step. - Step 2: Run systemAdd step → Run system, Ticks
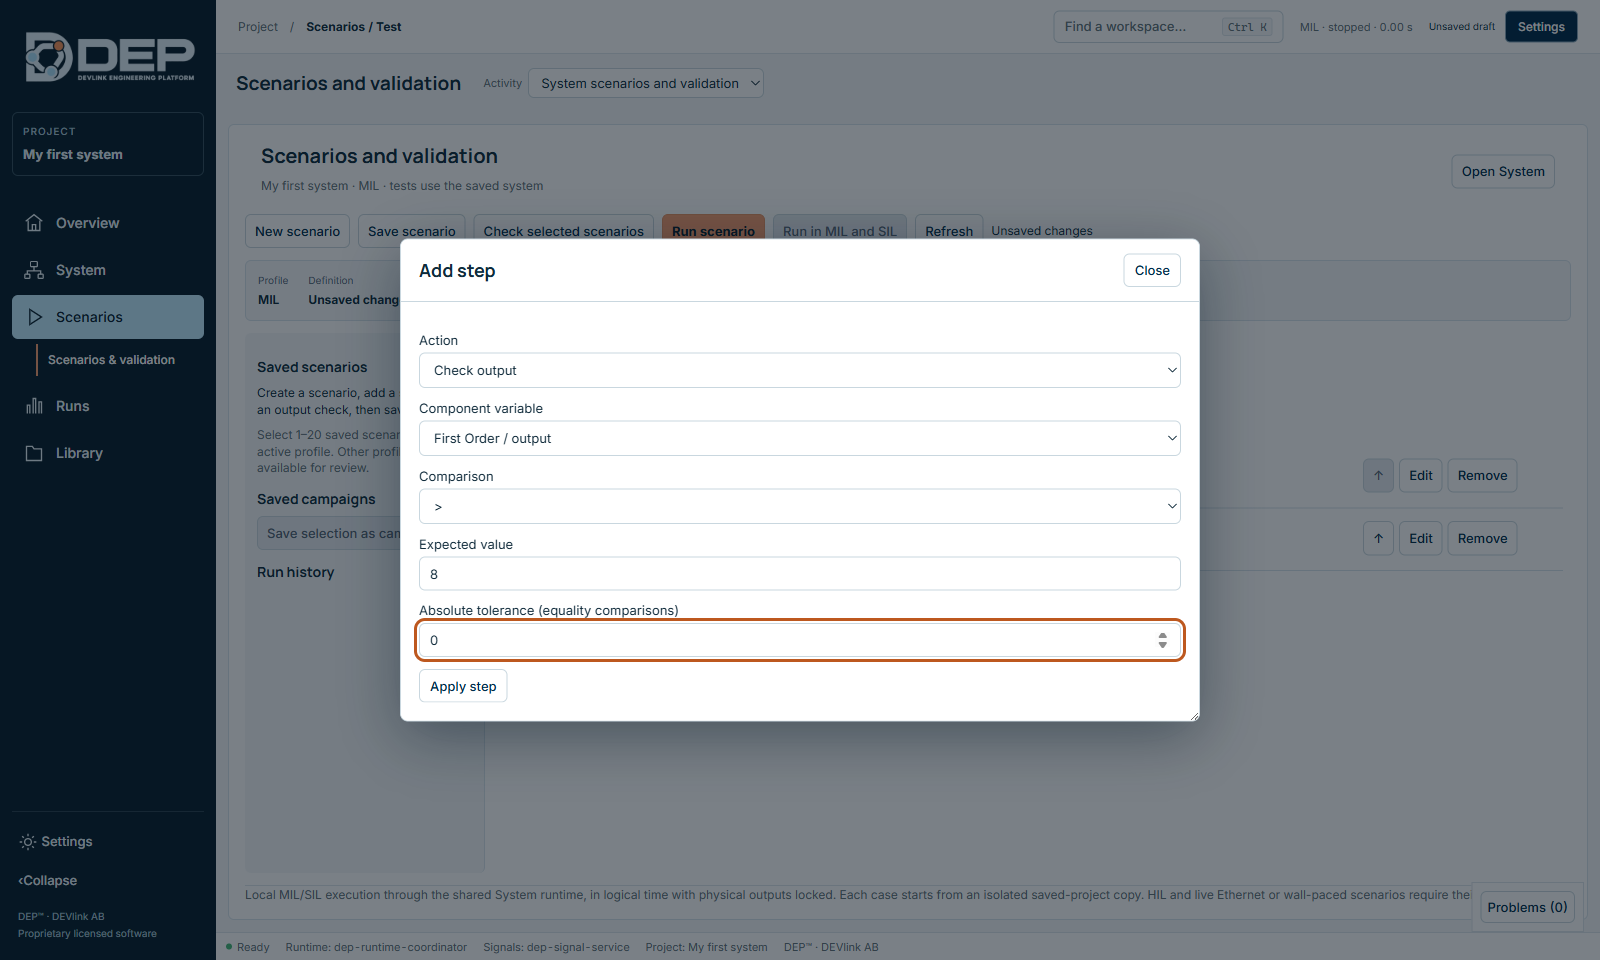
100→ Apply step. The list shows Run 100 ticks (1000 ms). - Step 3: Check outputAdd step → Check output, Component variable First Order / output, Comparison
>, Expected value8, tolerance0→ Apply step. - SaveSelect Save scenario. The scenario appears under Saved scenarios.
- CheckTick the scenario and select Check selected scenarios. The result reads Selected checks passed for local MIL execution. This is not a test verdict.
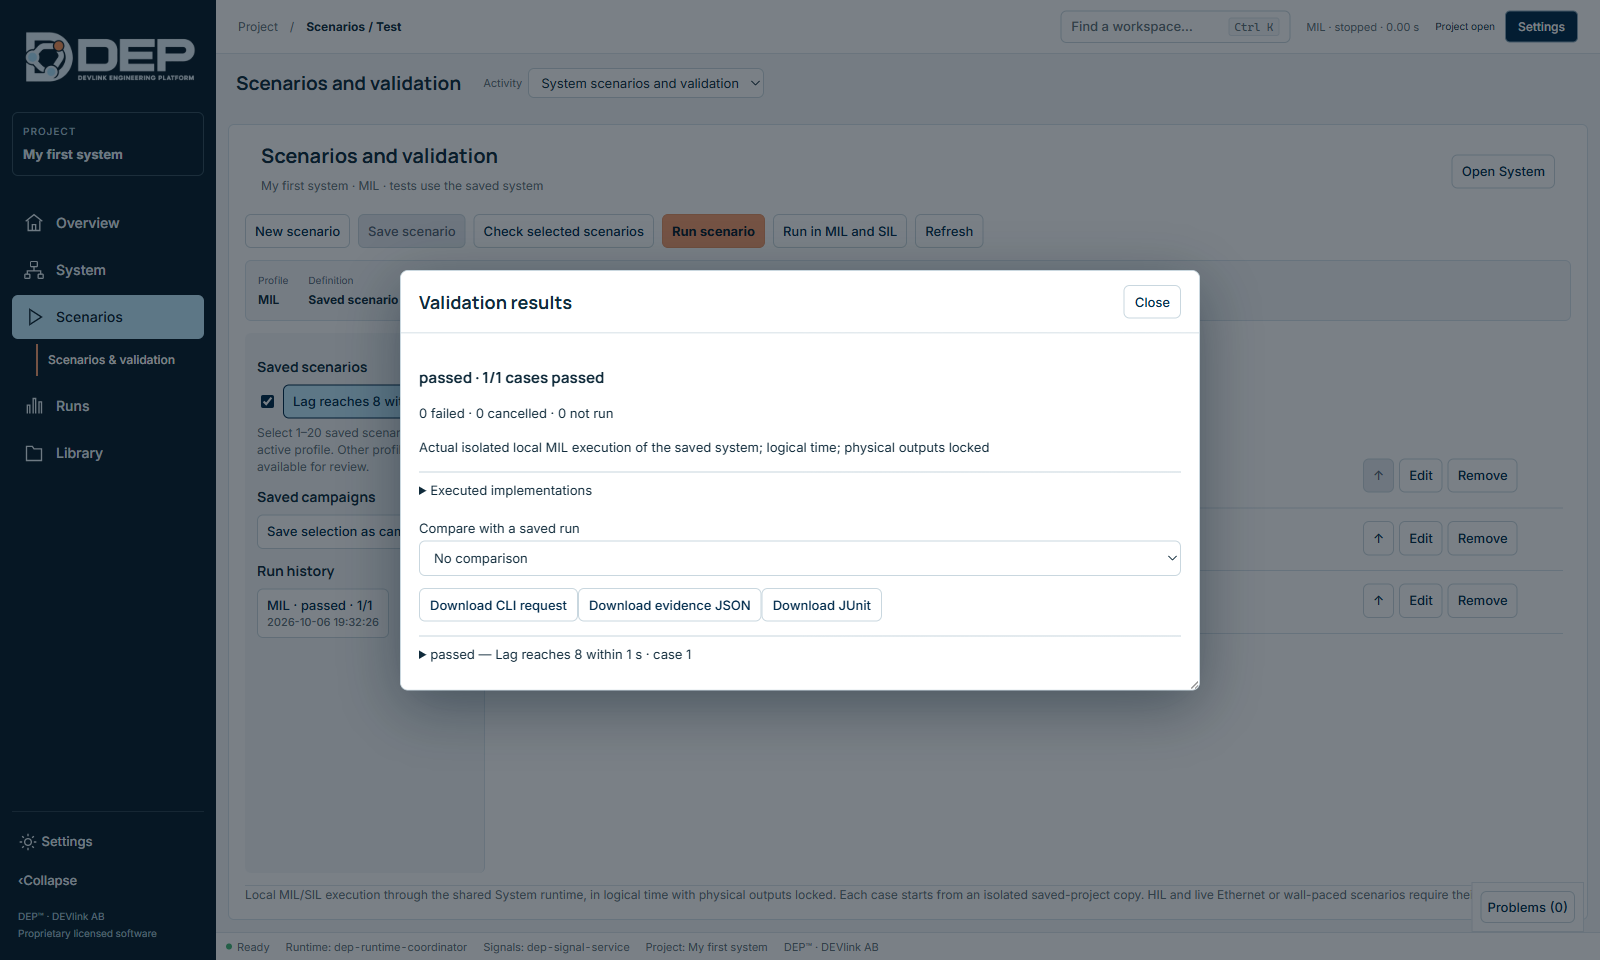
- RunSelect Run scenario. When the run completes, Validation results opens automatically, and a new entry appears in Run history: MIL · passed · 1/1.
- Review laterSelect a history entry at any time to reopen its results.
Always fill in Expected value before you select Apply step. A check step applied with an empty expected value shows > undefined, and saving the scenario then fails with DEP-UNEXPECTED. If this happens, select Edit on the step, enter the value and save again.
Where DEP detects a missing field, Apply step stays disabled, and the dialog says what is missing: Choose a component variable., Enter a value., Enter an expected value. or Enter a tolerance of 0 or more. A scenario that is still invalid when you save is refused with DEP-TEST-DEFINITION, and nothing is saved.
Validation results
- The headline verdict (passed · 1/1 cases passed) and the counts of failed, cancelled and not-run cases.
- A statement of what ran: Actual isolated local MIL execution of the saved system; logical time; physical outputs locked.
- Executed implementations: the exact implementations and hashes used.
- Compare with a saved run: choose an earlier run to compare against.
- Download CLI request, Download evidence JSON, Download JUnit. Each opens a Save dialog, and cancelling writes nothing.
- One expandable row per case, for example passed — Lag reaches 8 within 1 s · case 1, with each step's observed values. For a failed case, Open failed scenario takes you to it.
Run in MIL and SIL
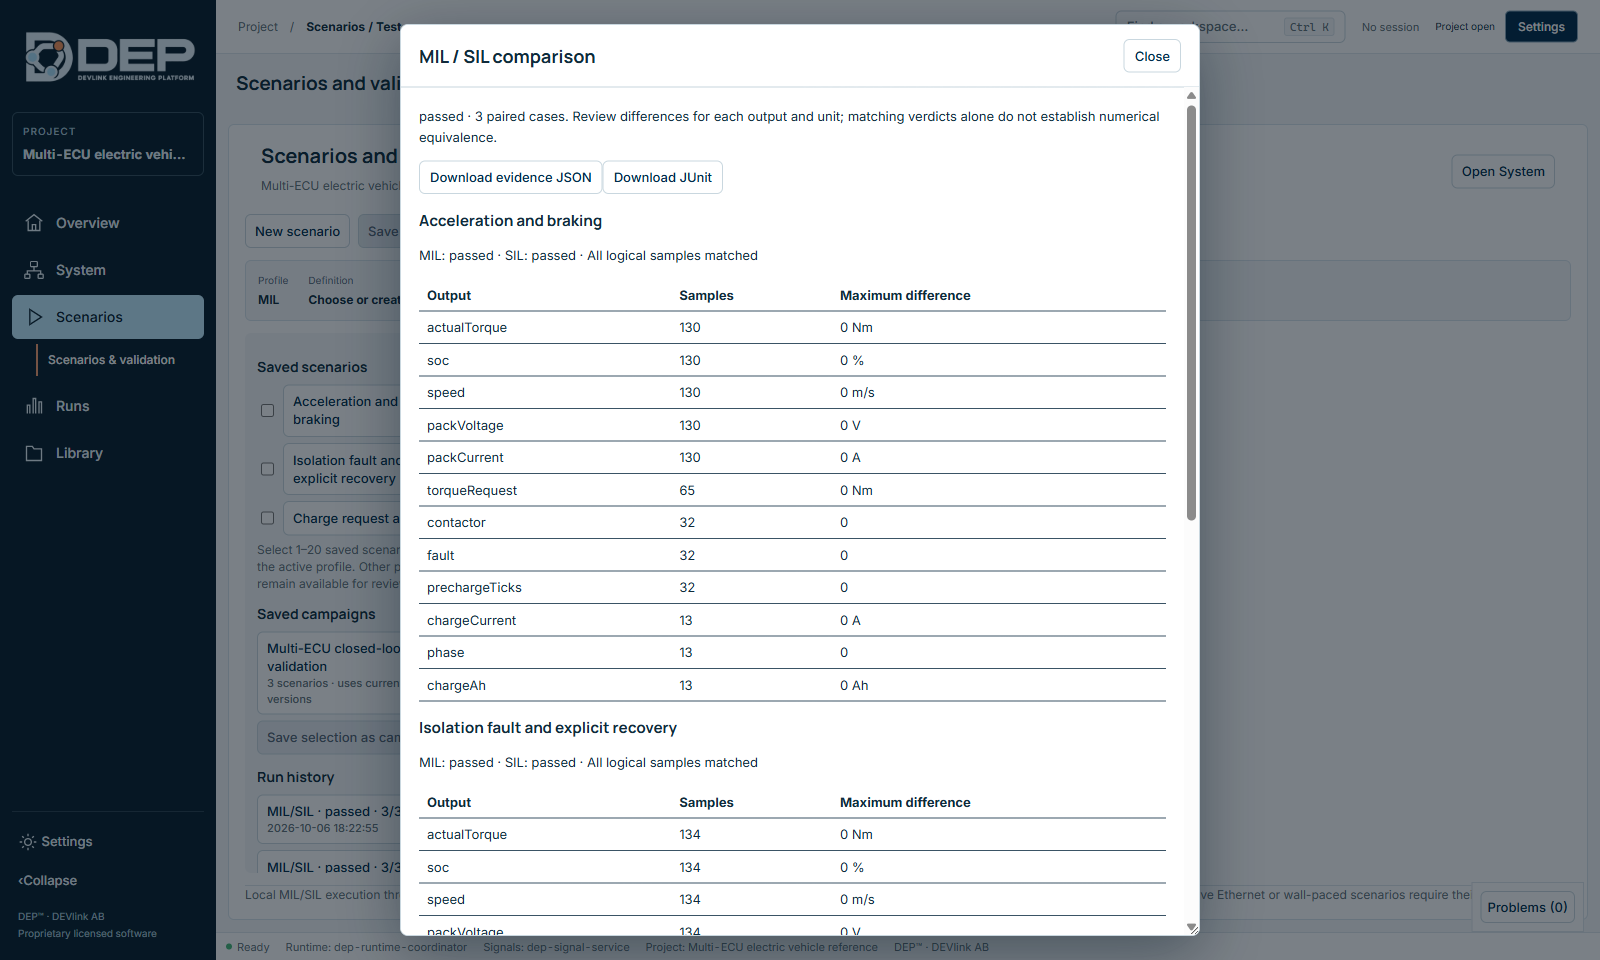
Run in MIL and SIL runs every selected case in both profiles and opens the MIL / SIL comparison, with verdicts per profile and the maximum difference for each output. See From MIL to SIL for a full walk-through.
Sweep and repeat
Expand Sweep and repeat under the step list to turn one scenario into many cases:
- Add sweep variable: choose a variable and enter values separated by commas, for example
5, 10, 20. One case runs for each value. Several sweep variables are combined. - Repetitions: run each case several times.
- Requirement IDs: link the scenario to requirements. The IDs appear in the evidence.
A campaign may have at most 100 cases and 100,000 ticks in total.
Campaigns
- Tick the scenarios you want under Saved scenarios, up to 20.
- Select Save selection as campaign and name it.
- Next time, select the campaign under Saved campaigns. The run button then reads Run n scenarios. A campaign always uses the current saved version of each scenario.
Run history
Each run adds an entry with profile, verdict, count and time, for example MIL/SIL · passed · 3/3 · 2026-10-05 16:24:39. Select an entry to reopen its results. History is stored in the project.
Other test activities
The Activity selector of this workspace offers more test tools:
| Activity | Purpose |
|---|---|
| System scenarios and validation | The scenario editor described above. |
| Legacy scenario draft editor | Older scenario drafts, kept for compatibility. |
| Network Scenarios | Scenarios for the restbus: phases Setup, Body and Teardown. Steps include set, assert and wait for a signal, enable and disable a fault, run and reset a model, record a canonical window, replay a recording, and calibrate or assert A2L values. Controls: Run, Start debug, Step, Stop debug. |
| Test & Automation | Campaigns and suites for the restbus: New campaign, Run campaign, New suite, Add case (repetitions, parameter sweep JSON). Export evidence pack writes JSON, JSONL, JUnit XML, HTML and a SHA-256 manifest. A headless automation API on localhost lets CI systems start runs. |
| Fault Injection | New fault on a Target signal. Choose the Injection stage (Pre-model / sensor-received value or Post-model / transmitted value), the fault operator, values A and B, start time, duration and a random seed. The panel lists applied fault events. Clear evidence removes them. |
Good practice
- Start every scenario from a defined state: set all inputs it depends on, even if the default seems right.
- Use tolerances on equality checks of continuous values. For example, check
== 140with a tolerance of0.01. - Keep each scenario short and focused. Use sweeps rather than copies.
- Name scenarios after the requirement they prove, and fill in Requirement IDs.
- Export JSON and JUnit for every software release you test, and keep them with the project revision.